Saturday, April 28, 2012

From Rags to Riches, Patio Set Transformation on a Dime


I have had this project finished for a while now but never took pictures of the end results or blogged about it, so here it is! 

My husband picked up a rod iron patio set from a garage sale as a surprise for me. I'm not going to lie, it was in pretty bad shape. The cushions were completely ratty and weathered- those went straight to the trash. I'm not sure what the original paint color was, it was so rusted and weathered that I was a little worried if I could bring it back to life. But the chairs had a shabby chic feel and I liked their lines so I got about 8 cans of creamy Heritage White spray paint (Rust-Oleum) and went to work. 

The Before:
 I sold the umbrella stand and also bought a different table since I really had no clue how to make an insert for the frame.


 And Now:
I found the red cushions on clearance at Kols for like 6 bucks a piece, score! The yellow double cushion I found at Walmart for $13.00.


Sorry about the poor lighting, the lattice on out patio is nice for shade but not so much for pics. :) 

Friday, April 20, 2012

Today wasn't a total waste...


Feeling crummy is my new middle name. Days like these it's a wonder I even get out of bed! I did manage to paint up my new little treasure from D.I. I scored a couple weeks ago for 10 bucks.
Here she is!


This is the before:


I have her in my kitchen next to my white board to hold markers and keys. I love it because it's functional AND pretty. Can't beat that. :)

Today, I painted her with a can of aqua spray paint:

Then glazed with a mixture of black paint and wipe on poly...


I think she turned out well. I am a fan of the color in my kitchen.
I'm slowly working my way up to painting pieces fun bright colors, the glaze really helps tone it down.
Baby steps.


Linking up to:


Friday, April 6, 2012

Separated Blogger Accounts

Hi Friends,

I was tired of paying for Google storage so I separated my blog accounts in the best way I knew how, without risking losing all of my posts from both of my blogs (I'm really not blog savvy). Anyway, I am no longer following all of my favorite blogs- BUMMER! :( I will be trying to find everyone again, any suggestions on how to do this easier than one at a time? I would appreciate any tips or pointers! Have a splendid day! :)
Carisa @ Paintmeshabby

Monday, March 19, 2012

UPDATE on the Dining Nook!

This has been the LONGEST project ever and we are so close to finishing it completely!
A big shout out goes to my husband, he really did this entire project on his own. I don't know what I would do If I didn't have such a handy husband!

The finish work is all that is needed and making cushions for the benches. 

Here are just a few pictures for you to see this painfully long process. 

Still not sure what the builders of these houses were thinking. Putting a railing here really doesn't put this space to good use. 
Pulled out the railing and hubby built a pony wall. James is a super helper!
This is just a priceless picture. Love my boys!

At last, a wall!

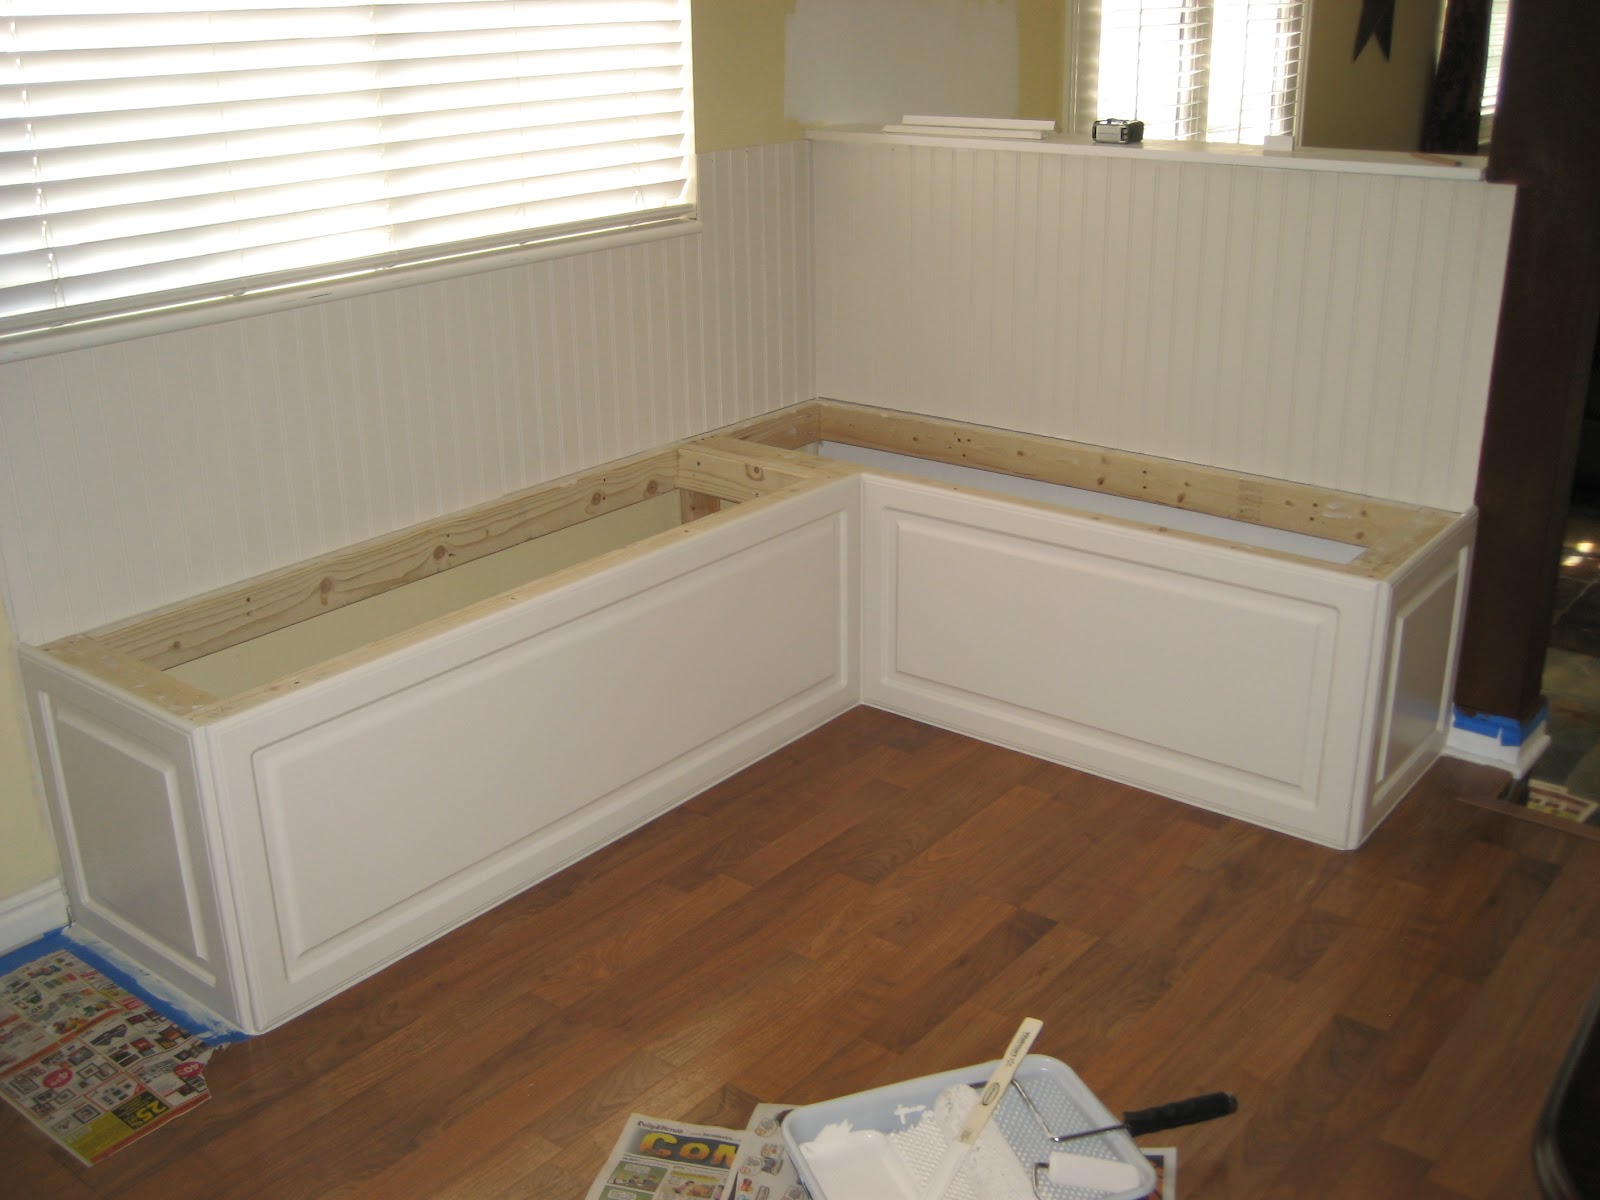
Hubs framed in some benches...

Put up bead board and found some cabinet fronts that fit my style perfectly!
 
Cabinet fronts in place and caulked.

Painted the bead board and cabinets

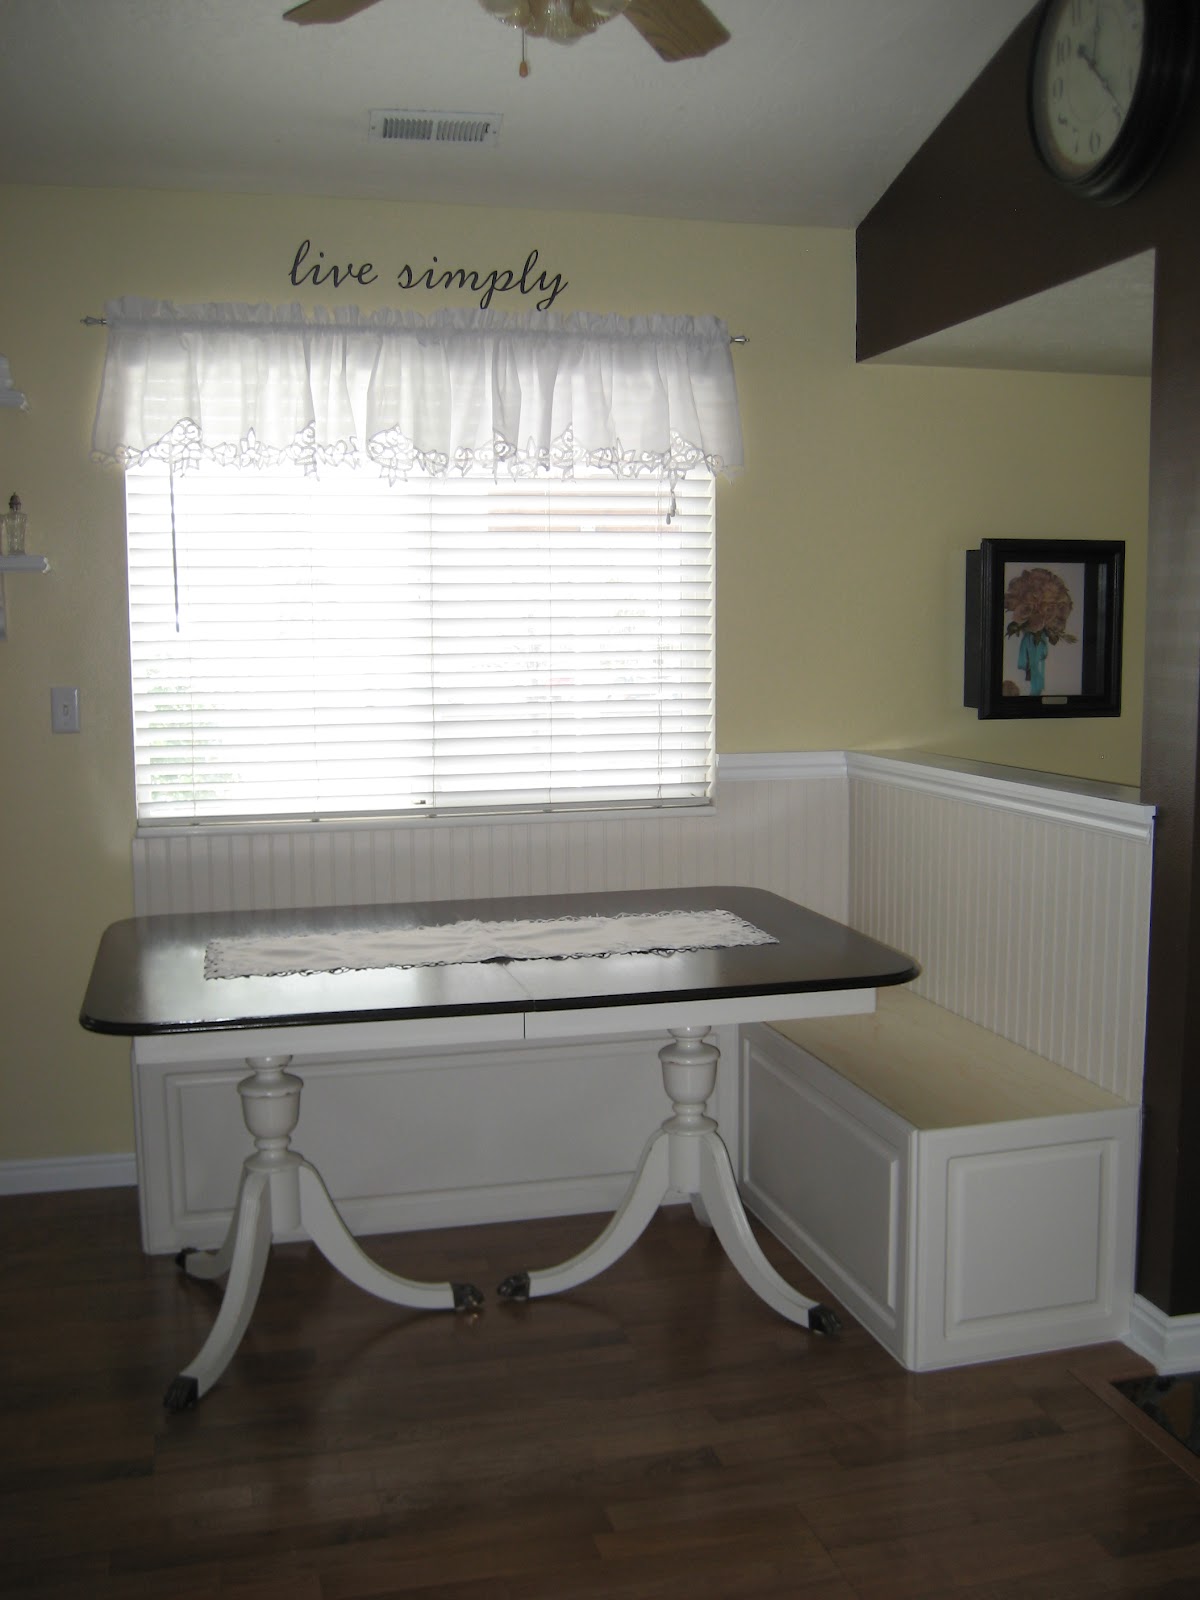
Added trim and painted the connecting walls. Nearly finished!

Ahhh, love it!

The computer desk finally looks like it belongs!


Fabric for the bench cushions and for the seats of the chairs I am going to be refinishing.  Those chairs will probably take some time to finish but they will be gorgeous once their finished! 
Stay tuned for the final reveal! :)

Thursday, February 16, 2012

Kitchen Table Part {2}

The kitchen table is finally finished!
 I won't go into detail as to why this project has taken two months, I'll just say that I have had some health problems that prevented me from doing almost anything from December to mid January. Pregnancy wise I'm entering my 22nd week, still sick and struggling to find energy but I'm surviving. 

Remember this table before? 
 After sanding the top..

Now, I have to give credit to my sweet husband for the major sanding and staining of this table. He was so kind to help me, and he did a wonderful job too! He (we) stained it a dark Mahogany color. I love how rich and pretty the wood grain turned out. 

 I didn't bother sanding the bottom portion of the table, I gave it two good coats of paint and sealed it with my wipe on poly. Worked like a charm. Hopefully it holds up with wear and tear.

I love it. It's perfect for this space. The chairs are next on my agenda. I've already bought my fabric, so I just have to do it!

Saturday, December 10, 2011

A New Dining Table!

So you remember how I was saying how much I wanted a breakfast nook? Only this would be the dining nook- because my house is tiny :) Well... I told my husband and he said he would help me! 

...So a couple weeks ago I sold my kitchen table... and chairs. 
 They were fine but I needed a square table to do what I have envisioned so the pretty thing had to go.

I put them on the KSL classifieds and they sold for $200. They sold a little sooner than I had expected so we have been living without a table and chairs which is no big deal since we usually sit at the kitchen counter anyway. But I would like to throw an after Christmas dinner party and a table is kind of needed for that. 

So I searched for a couple of days and found the PERFECT table. I know I use caps a lot when I am excited but honestly- I'm not using my caps loosely here! It's PERFECT! 
I picked it up for $100 (well actually my sweet, sweet hubby did)

So here's the beaut (Don't mind my disastrous garage!)
This is what I have planned for her:

This is a table from Ballard 

This one is from Sears
Both of these tables retailed for around $1,000-1,200. 
No thank you! Once I'm finished with this project I'm thinking I will be in it around $350 and the money from my table and chairs that I already sold will offset that cost. 
I also snagged some vintage chairs that are going to need a LOT of work but they will be perfect for the table when I finally finish them. Pictures will come in a later post of those so check back soon! This project is going to be done within the next couple of weeks.

Thursday, December 8, 2011

Update

(This picture made me laugh, I thought it would be appropriate given the nature of my blog)


It's been long overdue, a post! I have been extremely ill these last few weeks, actually these last 6 weeks to be exact. Yes, I've had the dreaded 'Morning Sickness'. Except that this is not just morning but it's also; mid morning, noon, afternoon, evening and night... I'm sure you get it. 
It's been around the clock.
I'm not meaning to complain because we are extremely excited! 
                        
       James (2 1/2) is also excited- he will make a great big brother! We told the family on Thanksgiving with this shirt I made for James.

            
I am just about out of my first trimester so hopefully this sickness starts to let up. I have been so exhausted from nausea and vomiting that I have had zero energy to tackle the projects that I have lined up- which is going to be awesome when I get to them but for now I am trying to take it easy. I just wanted to let all of my followers know that I haven't fallen off the face of the earth, I'm just growing a little human! :)

Monday, November 21, 2011

New Slipcovers!


I have been looking and looking for some inexpensive slipcovers for my couches for quite some time now. I have two sets of couches that I was looking to cover- the problem is always that the slipcovers never fit right or they just look cheap.
Well, the week before last I was reading up on some blogs and I stumbled upon one that was writing a review for a slipcover company. The company was Uglysofa.com, after seeing the pictures and reading her review I was sure I had to order some of my own! I went on ugly sofa's website and found the perfect slipcovers and ordered them. I did come across a problem that I wanted to fix so I emailed them before my shipment went out and they were extremely nice to work with and made sure the error (on my part) was corrected. :) 
Also, I should mention that these slipcovers were all Potterybarn brand x'd out. So you can't beat the quality or the price- which was around $29 per couch. 


These couches are the most uncomfortable couches of all time. So, I sold them over the weekend. The good news is that my in-laws were getting rid of theirs (which are super comfy-just a bit out of style) so we got theirs :)


And the glorious slipcovers! :)
*Please note that I know how silly the couches look without enough throw pillows.
This will be one of the many projects I work on this winter! 


I got the cream twill color and pre-washed them and put them on the couches slightly damp- this helped fix the wrinkles. 

Also, Uglysofa.com is having 20% off sale that ends tonight at 12:00am- with code: mitch 
which is an awesome deal considering that they are already a great price! 
Just wanted to share my new treasure! Enjoy!

Friday, November 11, 2011

I love Nate...

Okay, I have a confession to make. 
I LOVE, LOVE, LOVE The Nate Berkus show. 
There, I said it. Glad to have that off my chest!
I always get so many great idea's for new projects and he helps me think outside the box. 
After watching his segment today I realized that I want to have a breakfast nook! It can't be THAT hard right? 

A breakfast nook to me is cozy and usually involves a bench...

Here are some pictures that I am using as inspiration:
 Better Homes and Gardens


 The Lennox


This one is probably how mine will look. I plan to find some old kitchen cabinets, cut them to size fix them up and add some bead board. I also plan on having the cabinets double as a seat and storage space. I also plan to make my own bench cushions so hopefully Santa brings me a sewing machine for Christmas! ;)
This Old House
Here is a link to This Old House's tutorial on how to build your own breakfast nook: