Saturday, October 27, 2012

Filling the Awkward Space Above Kitchen Cabinets


Trying to find balance in everything is hard to do. I have been quite busy taking care of the kiddos and filling cake orders so this poor little blog of mine has been suffering. Hopefully soon I can learn to balance everything and make time for me! 

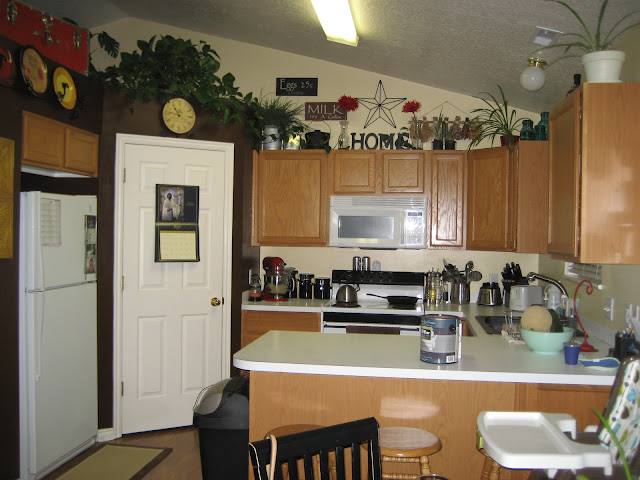
Here is a little update. Trevor and I worked on re-arranging the space above the kitchen cabinets a few weeks ago and I have to say, I love how they turned out! I swear that is the hardest place to fill up and make look good at the same time! I ended up getting rid of some things that just weren't working out anymore. 

One thing I learned when filling up an awkward space like this is to try to have somewhat of a theme. Also, make sure things are placed at different heights. Here is the evolution of my kitchen:
One word sums this up: embarrassing.


Just before I painted the kitchen

After I painted it


After we added crown molding to the cabinets.


All Finished!

I love it.


Those two old road markers are special to me. They came from my home town in Idaho. Big Cedar was the main road and Private Dr. #3 was the marker for our driveway.  When they were replaced with the metal signs, my brother snagged them for me. Probably one of the best, most thoughtful gifts I've ever been given.

Also, that Be Grateful sign was a free printable I found on Pinterest, I plan on printing up the other two once I find frames for them. Here's the link:


Thanks for stopping by!


Tuesday, August 28, 2012

Projects, projects

These past two months have literally flown by! I am depressed because: 1. My baby boy is growing like a weed and 2. I haven't been swimming yet this summer! While taking care of the new little guy has been first and foremost I have managed to cram a few little projects in over the last few weeks. Here is one that is in the works (major props goes to my amazing husband for doing the hard work ie. stripping, sanding and fixing the drawers!) 

 This is the project I meant to get finished before baby arrived but it just never happened. It was in really rough shape. None of the hardware is original except for the key holes, bummer. But I fell in love with the curves and I knew it would be perfect in the nursery so against my husbands better judgement I bought it. I am still up in the air about the color it will be. I may end up painting it creamy white again but we will see.
It had LAYERS and LAYERS of paint on it. It was definitely due to be stripped.


Friday, June 15, 2012

Everything and the Kitchen Sink!

My sweet husband has been hurrying to get all of these last minute projects done before baby comes. One of my biggest projects I have been wanting has been a new (to me) kitchen sink. The faucet in the kitchen has been leaking and spraying out places it shouldn't when it's turned on, plus--- I absolutely DESPISE the sink the last homeowner put in. We have hard water and whatever the material this sink is made out of shows every little spec of limescale buildup and it's nearly impossible to clean. Not a good combination for this EXTREMELY slightly OCD girl!

A while back Trevor bought a porcelain sink at D.I for a steal knowing that I have been wanting one forever he went ahead and bought it. It has sat in our shed out back just waiting to be put in. Well, last week he finally installed it and we bought a new faucet too. It's amazing how something so small and simple can make such a huge difference in the kitchen! I love it, it's clean, slightly country looking and fits the kitchen perfectly. 

Old and busted:


New and improved:


Passing the time waiting for baby...

I am exactly one week away from my due date. Today it feels like I'll be pregnant forever! I'm anxiously awaiting this little guy to decide when it's time. To get my mind off of thinking I decided to do some painting projects today. 

Here is one of them:
 I've had this plaque for a while and I haven't been a fan of the font or the color so I decided to spray paint it and use the Silhouette and re-make it.

 Spray painted, sanded, with the vinyl applied.


Sunday, May 27, 2012

New carpet revealed!

Last week we had new carpet put in the house. The carpet in this house has never been replaced. That's 14 year old carpet! Yuck! Anyway, with a new baby on the way I decided that it was time to replace it. I didn't want another baby rolling around on the nasty old carpet. 

My husband and I were at odds about the color choices. All I know about carpet is that the foam mat placed underneath the carpet is really important to how the carpet feels and wears over time. Also, the darker the color the smaller the space feels. When I picked up the carpet samples, I found the perfect color, I didn't even feel like I needed to see other options once I saw it. Problem? Trevor didn't like it. He liked a much darker color. A couple weeks went by and we were nearing the date to have the carpet installed so a decision had to be made. Trevor told me that he was going to let me choose the color, he just wanted to get the new carpet in. So my color it was!

I have to admit, on the day they came to install the carpet I was pretty nervous. What if I chose the wrong color? Well, as soon as I saw it I knew I chose the right one. It was perfect and even darker than I thought it was going to be- which was one reason Trevor didn't like the sample, he thought it looked too light.  

Here are some before pictures of the old carpet:
                                                      
James running around his room :)

Master Bedroom

 Hallway

Stairs

Nursery after Trevor pulled up the old carpet and padding

After we pulled out all the carpet and padding I hurried and taped everything off and gave all the baseboards a new fresh coat of white paint- they were pretty beat up and in desperate need of a paint job after years of wear and tear and paint drippings.

James's room with the new carpet!

The Nursery

The Hallway

The Stairs

The Master Bedroom


The color is called Fossil. It is gray- some of the pictures it looks sort of brown but it's not at all. I am in love! It complements the walls and furniture perfectly. It feels like we got a new house!

Thursday, May 24, 2012

Cushions for the Breakfast Nook

Well, I think the hard part is over. Last night and this morning I finally tackled putting the fabric on the cushions. I think I got WAYY too much fabric- thanks to my handy husband we were able to use the whole piece we cut. Guess I will be making lots of pillow case covers and maybe some drapes?? It's a good thing the fabric is pretty!

I originally bought two 3" foam pads meant for camping at Home Depot- I looked everywhere for a foam pad that would work for this project that wouldn't cost an arm and a leg. The pads at Home Depot were only $20.00 and they were perfect!

After doing some research online I discovered the best way for cutting foam pads. An electric knife! Who knew? Some ladies attempted using bread knives and I'm sure that took forever and looked like a hack job. I decided to look for an electric knife. So the hubs and I took a trip to one of our favorite thrift stores, D.I.! Low and behold there was an electric knife there for $5.00 with three extra blades. Score.


My husband did pretty much everything for the next few steps. He measured the foam pads and discovered that if he cut them just so he would only need one foam pad for both seats! So I returned the second pad. 

Trevor used spray adhesive to attach the foam pads to the wood, let that dry and started to trim the foam. I helped with some of the cutting and seriously, that knife cut through the pad like butter. Don't ever cut a pad with anything BUT an electric knife!

After the pads were cut to size, I sanded all of the edges of the wood, especially the corners- I didn't want years of wear and tear to make holes in the fabric. 
 

We rolled the fabric out, measured and started cutting. 

I cut two strips of ribbon to attach to the end of each cushion so I could lift them up to access storage underneath.

The fun part, stretching the fabric over the cushion and stapling. 


Fabric in place, added the ribbon tab.
 
Yes, it's not too pretty or finished looking yet- I plan to paint most of the wood and work on a way to organize it better.

All covered up and in place.

 I like how the tab turned out. :)
Fast forward to the part where both seats are covered and in place:

And just because I always love a good before and after:


If you want to see the entire step by step process go here:
http://paintmeshabby.blogspot.com/2012/03/update-on-dining-nook.html

Thanks for stopping by!